


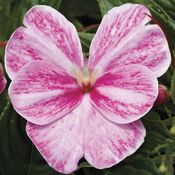


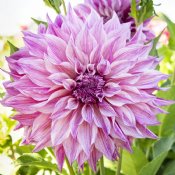


Dahlias are more than just a vibrant spectacle in the garden; they are a symbol of ingenuity and diversity in the horticultural world. Their stunning array of colors, forms, and sizes have captivated gardeners and floral enthusiasts for centuries.
Dahlias, with their origins in the mountainous regions of Mexico and Central America, have evolved from Aztec cultivation to European and North American ornamental showcases. However, the heart of this guide lies not in their past, but in their present – in your garden.
Your Quick Reference Guide Through Dahlias
- Types of Dahlias
- Understanding Dahlia Tubers
- Planting Dahlias
- Post-Planting Dahlia Care
- Natural and Chemical Pest Management for Dahlias
- Troubleshooting Common Problems with Dahlias
- Diseases Common to Dahlias
- Expanding Your Dahlia Collection
- Winter Care for Dahlias
- Preparing Dahlia Tubers for Storage
From the first touch of soil in spring, to the joy of seeing the last bloom before winter, this guide is your dahlia companion. Discover how these resilient flowers can thrive, even in the most unexpected gardens, and transform your own space into a colorful haven for pollinators. In this comprehensive guide, we will delve into the art and science of growing dahlias, from planting these historic blooms to ensuring their splendor endures, and finally, their winter care.
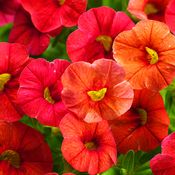
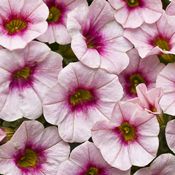
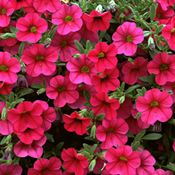
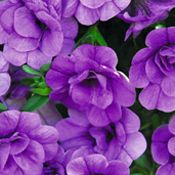
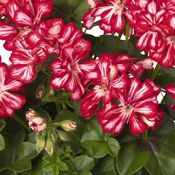
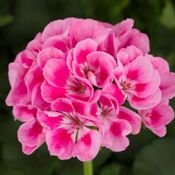
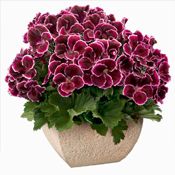
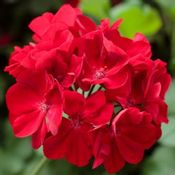
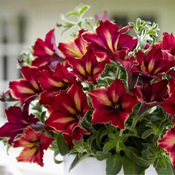
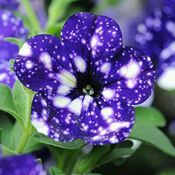
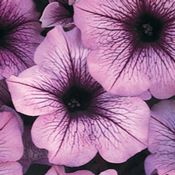
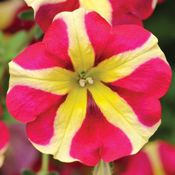
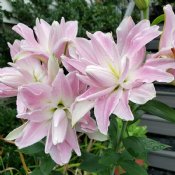
1. Types of Dahlias

- Single Dahlias: Having one row of petals around the center, it attracts bees and butterflies.

- Anemone Dahlias: The central disk, with its tubular florets boasts a bold look and bright colors.

- Collarette Dahlias: The pinwheel shape with small petals around the center attracts pollinators.

- Ball Dahlias: The round, full blossoms are perfect for striking flower arrangements.

- Pompon Dahlias: Like ball dahlias, but larger, with open blooms, they are prized for bouquets.

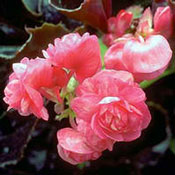
- Decorative Dahlias: These popular double blossoms come in a wide range of colors and sizes, though they are not considered ideal for attracting pollinators.

- Cactus Dahlias: These interesting dahlias have rolled or twisted petals. Pollinators are not a fan.

- Semi-Cactus Dahlias: This hybrid mix of decorative and cactus style blooms will add interest to your garden.

- Peony Dahlias: This pollinator magnet has showy petals in concentric circles. A garden beauty!

- Waterlily Dahlias: The flat, open blossoms are similar to waterlilies and will attract pollinators.

- Orchid Dahlias: This unique addition to your garden possesses exotic, twisted petals.
In the subsequent sections, we will delve into the specific needs of these varieties, from soil preparation and planting tips to maintenance practices that will ensure your dahlias thrive. We will also discuss winter care, so these stunning blooms, especially your favorites, can grace your garden year after year.
2. Understanding Dahlia Tubers

Dahlias are sold as tubers, which can be a single tuber, or a clump connected to a stem. The size and shape of these tubers vary greatly, but this doesn't impact the plant's success. Essential parts of a tuber include:
- The Body: Also known as the Tuber, this is the fattest part at the bottom; it acts as food storage.
- The Eye: Grows from the Crown of the tuber and is often already sprouted or will sprout to become the stalk of the new plant.
- The Neck: Connects the body, or tuber, with the crown containing the eye.
Even if some tubers in a clump are broken or loose, a single healthy eye, neck, and body can produce a flourishing dahlia plant.
3. Planting Dahlias
- Timing: Plant dahlias after the last frost when the soil temperature reaches at least 60°F (15.55°C) For those in colder climates, you can start your dahlias indoors to get a head start.
- Site Preparation: Dahlias thrive in full sun and well-draining soil. Enrich the planting area with 2-3 inches of compost.
- Planting Depth and Position: Dig a hole 4-6 inches deep. Place the tuber with the eye facing upwards and cover with soil just to the level of the surrounding soil.
- Staking: For tall varieties (3 feet or more), plant the stake when planting the tuber. Use a 5–6-foot stake and loosely tie the stems as they grow.
4. Post-Planting Dahlia Care

- Watering: Dahlia tubers begin to absorb water and fertilizer once roots are established, usually in about 3-5 weeks. So, until green sprouts emerge above the soil, there's no need for additional watering. After sprouting, adopt a deep watering approach as the roots will extend 6-10 inches deep. Using a slow-running or soaker hose is preferable to hand-watering. In temperatures of 70-80°F, water 2-3 times weekly, increasing frequency during hotter periods. For container-grown dahlias, water daily, and consider watering twice daily in extreme heat.
- Pinching for Growth: When plants have 3-4 sets of leaves, pinch the top off just above a full leaf set to encourage fuller branching and more blossoms.
- Fertilizer: While dahlias benefit from some nitrogen, too much can be harmful. Besides adding compost when planting the tubers, regular feeding is key to vibrant blooms. When selecting a fertilizer, understanding the NPK ratio: Nitrogen (N), Phosphorus (P), and Potassium (K) is important. A lower nitrogen component is ideal—aim for it to be half of the other two components in the ratio, i.e.: a 5-10-10 NPK. The nutrient needs of dahlias can vary based on weather, soil type, and location. For dahlias in the ground, fertilize every 3-4 weeks. Those in pots require fertilization every 2-3 weeks. Sometimes, a plant may need a little extra help. If your dahlias are struggling, a boost of nitrogen, like a small dose of Miracle-Gro, can be beneficial.However, use caution when applying high-nitrogen products. For plants with yellowing leaves, Epsom salts can provide a much-needed dose of magnesium to aid in the greening process.
By midsummer, your dahlias will be in full bloom. Regularly deadhead spent blossoms or cut them for indoor enjoyment. Dahlias are "cut-and-come-again" flowers, so the more you cut, the more they bloom.
5. Natural and Chemical Pest Management Strategies for Dahlias
Strategies Include both organic approaches and specific chemical treatments for show-quality blossoms.
Natural Pest Management for Dahlias:
- General Organic Gardening Approach:
- Focus on ecological balance rather than pest eradication. Ecological balance can be achieved by planting herbs that deter pests near or around your dahlias.
- Dealing with Slugs and Snails:
- Use physical barriers like sheep's wool and organic slug pellets (ferric phosphate).
- Encourage garden wildlife to boost natural predator populations. Ground Beetles and Harvestmen eat snails and insects. Frogs and Box Turtles will also be beneficial for natural slug and snail control.
- Earwig Control:
- Preventive measures include applying vaseline on stems and setting up traps.
- Promote a diverse ecosystem for natural pest control. Birds, lizards, and Yellow Jackets will eat earwigs.
- Earwigs, while sometimes harmful to dahlias, also control aphids, so complete eradication is not advised.
- Interplanting Strategies:
- Use nasturtiums as a trap crop and plant buckwheat for soil cover.
Chemical Applications for Show-Quality Blooms:
- Aphids: Foliar applications of malathion or diazinon, or soil application of disulfoton.
- Leafhoppers: Treat with malathion, diazinon, or soil systemic disulfoton.
- Plant Bugs: Use malathion or rotenone, with frequent applications if necessary.
- Spider Mites: Apply specific miticides like dicofol, covering leaf undersides.
- Stalk Borer: Use Carbaryl (Sevin) on the lower stem and base of plants.
- Thrips: Remove damaged blooms and treat remaining buds with malathion or diazinon.
Important Considerations:
- For natural pest control, the focus is on maintaining a balanced ecosystem.
- Chemical treatments should be used as per label directions and precautions.
Remember, the key is to work with nature and use chemical treatments responsibly for the best results in your dahlia garden.

6. Troubleshooting Common Problems with Dahlias
Growing dahlias can be a rewarding experience, but like all plants, they may require specific TLC to provide the most beautiful blossoms. Here are solutions to the most common problems to help you keep your dahlias thriving:
Drooping Flowers
- Cause: Often due to insufficient watering or nutrient deficiencies.
- Solution: Ensure consistent deep watering, especially during periods of hot weather. Deep water at the base of your plants, rather than spraying the foliage. Use a balanced fertilizer to address possible nutrient shortages. See the section above on Fertilizer.
Discoloration of Leaves or Flowers
- Cause: This can be due to nutrient deficiencies, particularly nitrogen or magnesium, or pest and disease infestation.
- Solution: For suspected nutrient issues, apply a balanced fertilizer and consider Epsom salts for a magnesium boost. See the sections on pest management and diseases if your dahlias have been on a regular feeding schedule.
Stunted Growth
- Cause: Caused by poor soil conditions, inadequate light, or constrained root growth in containers.
- Solution: Plant dahlias in well-draining soil rich in organic matter and ensure they receive full sun. If grown in containers, provide ample space for the roots. Remember, dahlia roots can be 6-10 inches long.
Flower Bud Drop
- Cause: This can be triggered by erratic watering practices or extreme temperature changes.
- Solution: Keep soil moisture consistent and shield plants from drastic temperature fluctuations.
Yellowing of Leaves
- Cause: Overwatering, poor drainage, or a deficiency in nitrogen can lead to yellowing leaves.
- Solution: Adjust watering habits to avoid overwatering, improve soil drainage, and use a nitrogen-rich fertilizer with care.
By promptly identifying and addressing these issues, your dahlias should remain healthy and vibrant, showcasing their full beauty throughout the season. If at a loss, seek the help of an expert, either at a local nursery or a university extension service.
7. Diseases Common to Dahlias
Dahlias, while beautiful, are vulnerable to various diseases caused by fungi, bacteria, and viruses. Here’s how you can identify and manage these issues:
Vascular Wilt (Verticillium albo-atrum or Fusarium spp.)
- Symptoms: Wilting starts from the tip of a branch or may involve the entire plant, sometimes with partial recovery at night when in the early stages. Eventually, the plant will die, showing dark brown streaks in the water-conducting vessels.
- Control Measures: Use only healthy tubers and avoid planting in previously infected soil. Soil from affected areas should be pasteurized at 180°F (82.2°C) for 30 minutes or treated with Vapam. Remove and destroy all wilted plants promptly: do not add them to your compost pile, as these pathogens are soil-borne.
Botrytis Blight
- Symptoms: This fungus thrives in cloudy, moist weather conditions, especially in poorly ventilated areas. It produces gray spores and causes petal browning, soft rot, and bud distortion.
- Management: Clear all old plant parts in fall or spring. Remove and destroy infected parts during the growing season. In damp weather, apply benomyl solution (1 tablespoon per two gallons of water) as a preventative measure.
Virus Diseases (e.g., Mosaic Virus)
- Symptoms: Viruses will vary by cultivar. Susceptible plants may show stunted growth, pale green bands along the veins (“vein clearing”), and a bushy appearance. Some cultivars will show no symptoms.
- Control: Remove and isolate any stunted plants showing symptoms. Destroy any that develop characteristic symptoms. Since aphids transmit the virus, controlling aphids can reduce the spread to healthy plants.
To protect your dahlias, it is crucial to be vigilant about these diseases. Regular monitoring and adopting these defensive control measures can help ensure the health and beauty of your dahlia garden.

8. Expanding Your Dahlia Collection-Easy Steps for Cloning Your Favorites
Want to replicate your favorite dahlia varieties? Propagation through cuttings is your go-to method! It's best done in spring, just as the tubers wake up and start to sprout. Here’s how:
- Choose the Right Cuttings: Look for healthy plants showing new sprouts about 2-3 inches long. These are perfect for starting new plants.
- Cut with Care: Grab a sharp, sterilized knife and gently slice off a sprout piece. Make sure your cutting includes at least one set of leaf nodes (the bump where a leaf will or has emerged) and is about 3-4 inches long.
- Root Your Future Dahlias: Now, dip the bottom of your cutting in some rooting hormone. Plant it in a mix of peat and perlite or a quality seed starting mix. Keep the soil moist, but not soggy.
- Create the Ideal Environment: Place your potted cuttings in a warm, well-lit spot, but away from harsh direct sunlight. Aim for a cozy 65-75°F (18.3-23.8°C).
- Watch the Roots Grow: In about 2-4 weeks, roots should start forming. Once they're established and you see new growth, your baby dahlias are ready to move to their final home or bigger pots.
Optional Method of Propagation - Dividing Tubers:
If you prefer, you can divide your tubers in spring before planting. Just make sure each piece has a crown with an eye, a neck, and a healthy-looking body.
9. Winter Care for Dahlias in Different Climates
In Warmer Climates (USDA Zones 8 and Above):
- Dahlias can remain in the soil during winter.
- They will generally bloom year-round but may enter dormancy if temperatures dip below freezing.
- In spring they will resume growth and bloom.
In Colder Climates:
- It is essential to dig up dahlia tubers before the ground freezes.
- Store them in a cool, dry place over the winter to protect them for replanting next season.

10. Steps for Preparing Dahlia Tubers for Storage
These steps will help preserve tubers during winter and prepare them for successful replanting.
- Inspecting Plants: It is time to store your dahlia tubers when frost wilts the leaves. Choose only those dahlia plants that appear healthy.
- Cutting Back Foliage: Cut foliage back to 4-6 inches for easier handling.
- Digging Tubers: Use a digging fork to lift tubers carefully, avoiding damage.
- Cleaning Tubers: Wash off soil to check for damage and discard any rotting tubers.
- Drying Tubers: Let them dry for 24 hours in a frost-free, dry area.
Storage Preparation:
- Use a breathable container like a burlap-lined wooden or plastic crate.
- Layer vermiculite at the container's bottom.
- Use lightly moistened vermiculite as a storage medium.
- Arrange tubers so they don't touch.
- Cover them completely with vermiculite.
- Label varieties if necessary.
Storage Location:
- Store in a cool, dark place like a root cellar at 40 to 55°F (4.4 to 12.7°C).
- Avoid overly warm or cold areas. Your garage may be too cold. Monitor the temperature with a thermometer placed near your tubers and move them if necessary.
Monthly Maintenance:
- Check tubers monthly for rot or dryness.
- Mist lightly with water if they are drying out and recover with the vermiculite.
Dahlias are a wonderful addition to any garden, offering continuous beauty throughout the summer and fall. Propagating from your existing plants will not only ensure your favorites take center stage but will also save you money as you expand your dahlia garden.
Conclusion
Throughout this guide, we've explored the vibrant world of dahlias, from their rich history to the practicalities of their care and cultivation. We delved into the diverse types of dahlias, understood the nuances of dahlia tubers, and provided detailed instructions for planting, post-planting care, and managing pests and diseases. We also discussed the intricacies of troubleshooting common problems and outlined effective strategies for expanding your dahlia collection and ensuring their beauty endures through winter care.
Dahlias are not just flowers; they are a testament to the beauty and diversity of nature. As you apply the knowledge from this guide, may your garden flourish with the stunning colors and forms of dahlias, bringing joy and beauty to your space. Remember, each bloom is a result of your care and dedication.
